2 Versions:
CMXDL+ - Black & white model
CMXDLP-C - Color model The new CHECKLINE? CMXDLP+ is the top-of-the-line model in the CMX Series of Gauges that measures both coating and wall thickness quickly and accurately—from only one side. In addition, when switched to Pulse-Echo mode, the CMXDL+ automatically measures and eliminates the coating from the wall thickness measurement, enabling the user to locate the finest corrosion and pitting—without removing the coating. It features an A-Scan Display Mode allowing the user to see the actual wave form echoes, graphically, providing the insight necessary to tune the settings on the gauge for optimal performance. This is especially important on challenging measurement tasks. The CMXDL+ also features a new E-EV Operating Mode ("Echo-Echo-Verify"), also known as Triple-Echo Mode, which provides addition assurance that the displayed measurement is accurate and fully verified by subsequent echoes. Oversized graphic LCD is backlit and features easy to read fonts, graphics and display codes showing all critical settings including Velocity, Operating Mode, Alarms, Scan Mode and more. The backlight can be set to ON (always-on), OFF (always-off) or AUTO (automatically-on when measuring). Five user-selected operating modes are included: Coating On: Measures wall thickness using Pulse-Echo. It separately displays wall & coating thickness. Coating Off: Measures wall thickness using Pulse-Echo. It displays wall thickness only. Temperature Compensated: Measures wall thickness using Pulse-Echo and automatically adjusts calibration to compensate for changes in material temperature. Thru-Coat: Measures wall thickness only using Echo-Echo. (coating is NOT included) Coating Only Mode (CT): (Coating Thickness) Measures from 0.0005 to 0.100 inches (0.013 to 2.540 mm). Range will vary slightly depending on the coating. 
Special Features

Built-in memory with RS-232 output for transferring data to a Printer or PC Includes Datacomm Data Transfer & Analysis Software and RS-232 Cable, FREE
Data Files can be user-set for a "grid type" structure where data is formatted in Rows & Columns or a "sequential" file where all data appears in a single column
Each "grid type" File can be set for up to 999 rows by 52 columns
Each "sequential" File can be set for up to 512 rows by 1 column
Each File can be set for "data only" or as "data plus B-scan Graphic". Memory Capacity is over 225,000 data values or over 16,000 data values with B-scan

Features

Auto probe recognition with Auto Zero or Manual Zero. Adjustable Gain in 5 steps (VLow, Low, Med, Hi & VHi) in 2db increments providing a 8 db gain adjust range (42–50 db). Wide variety of dual-element probes can be used for nearly any application. 64 custom setups can be stored and retrieved for convenient use and labeled for easy identification Bar graph with user-set start end values providing highest resolution around the target thickness value. Display Hi/Lo Alarm Limits with audible and visual indicators. Differential Mode allows user to set a "target thickness value" and display will show the DIFFERENCE between actual and target thickness as a plus or minus value. 2 Year Warranty and CE-Certified Includes NIST-Traceable Calibration. Metal housing provides strong protection against harsh environments. T-8071-0868 Probe to 1"-1MHz Single-Element Membrane Probe to measure Blow Holes in Thick PE Pipes and Fittings Measures Coatings up to 0.100"

High Speed Scan Mode & B-Scan Mode

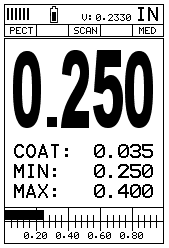
Hi-Speed Scan Mode
|  |

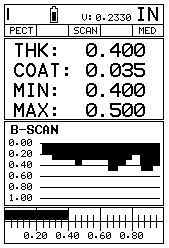
B-Scan Mode
|  |
 Measuring Limits Measuring Limits
 | Minimum Radius for Convex Surfaces | 0.350" (8.89 mm) | | Minimum Radius for Concave Surfaces | 3" (76.2 mm) |  | Minimum Headroom | 1" (25.0 mm) |  | Minimum Sample Diameter | 0.150" (3.8 mm) |  | Minimum Substrate Thickness - F | na | | Minimum Substrate Thickness - NFe | na |
 TI-CMXDLP-C Color Model TI-CMXDLP-C Color Model
Oversized graphic color LCD is backlit and features easy to read fonts, graphics and display codes showing all critical settings including Velocity, Operating Mode, Alarms, Scan Mode and more. The backlight can be set to ON (always-on), OFF (always-off) or AUTO (automatically-on when measuring). With ultra hi-speed processing (display update refresh of 120 times/second), TI-CMXDLP-C is also extremely effective tool when used in the Flaw “Prove-up” Mode, simulating the function of a Flaw Detector at a fraction of the cost to identify and locate cracks, dis-bonds, weld defects, etc. Also includes a “dampening feature” which helps filter the raw waveform data to clean-up the signal, especially with very low and very high frequency probes.  Quick Change Shear Wave Transducers(QC) Quick Change Shear Wave Transducers(QC) 
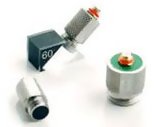
| Description | Threaded shear wave transducers for quickly interchanging between wedges. Ideal for limited access and curved surfaces. | | Used | General weld inspection | | Damping | High gain (G), Resolution(R) *Specify damping after (QC), No damping on 3.5 MHz | | Connectors | Microdot |
| Element Size | 2.25 MHz | 3.5 MHz | 5.0 MHz | 10.0 MHz | | .250" dia. | QC2525 | - | QC2550 | QC2510 | | .375" dia. | QC3725 | - | QC3750 | QC3710 | | .500" dia. | QC5025 | PQC5035 | QC5050 | QC5010 |
 Quick Change Wedges Quick Change Wedges
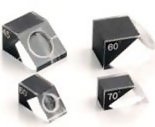
Quick Change Wedges - Custom angles available on requ | Element Size | .250" DIA. | .375" DIA. | .500" DIA. | | 45° | QW2545 | QW3745 | QW5045 | | 60° | QW2560 | QW3760 | QW5060 | | 70° | QW2570 | QW3770 | QW5070 |
 Specifications Specifications
| Range in Steel | Pulse-Echo Mode: Pit and Flaw detection measures from 0.025 - 9.999inches (0.63 to 254 millimeters)
Echo-Echo Mode: Thru Paint & coatings measures from 0.100 - 4.000 inches (2.54 to 102 mm). Range will vary depending on the thick | | Range in Coating Only Mode | 0.0005" - 0.1000" / Resolution: 0.0001"
(0.013 - 2.540 mm / Resolution: 0.001 mm) | | Max Coating | 0.100" | | Resolution | .001 inches (0.01mm) | | Velocity Range | .0492 to .3936 in./ms
1250 to 9999 meters/sec | | Units | Inch or mm | | Measurement Modes | - Pulse-Echo (corrosion mode)
- Pulse-Echo Coating (Corrosion w/o coating)
- Echo-Echo (thru-paint)
- Temp Comp (auto adjust for material temp)
- Coating Only (Ultrasonic Coating Gauge) | | Transducer Types | Dual Element (1 to 10 MHz). | | Output | RS-232 for upload/download of setups | | Memory capacity | TI-CMXDLP: over 200,000 measurements | | Power Source | Three 1.5V alkaline or 1.2V NiCad AA cells | | Battery Life | Typically operates for 150 hours on alkaline and 100 hours on NiCad | | Auto Power off | After 5 minutes of non-use | | Display | 1/8 in. VGA grayscale display 62 x 45.7mm | | Keyboard | Membrane switch with twelve tactile keys | | Case | Extruded aluminum body with nickel-plated aluminum end caps (gasket sealed). | | Temp. Limits | Ambient: -20 to 120° F (-30 to 50° C)
Material: -0 to 200° F (-20 to 100° C
Special high temperature probes are optionally available. | | Weight, net | 383 grams | | Dimensions | 63.5 W x 165 H x 31.5 D mm | | Warranty | 2 year limited | | Certification | CE Approved, Factory calibration traceable to national standards |
 Complete Kit Complete Kit
The CMXDL+ is supplied as a complete kit with the gauge, probe, 4 oz. bottle of coupling fluid, 2 AA batteries, NIST-Traceable Calibration Certificate, operating manual, RS-232 cable and data-transfer software —all in a foam-fitted carrying case  Related Products Related Products
NIST-Traceable Steel Test Block
3 Sizes Available | 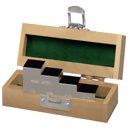 |

DataComm
Software for Thickness Gauges | 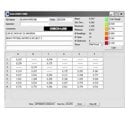 |

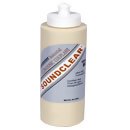
CF12
Coupling Fluid
|  |

TICC-M
Protective Holder for Ultrasonic Gauges | 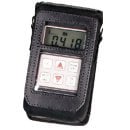 |

Uncertified Steel Test Block
For Ultrasonic Gauges | 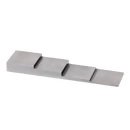 |

CF-2H
High Temperature Coupling FluidTemperature Range 0° to 600° F -18° to 315° C
| 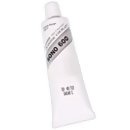 |

CF-4H-950F
High Temperature Coupling Fluid | 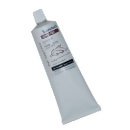 |

TI-CMX-UW-50
50 Foot Underwater Probe / Cable Assembly | 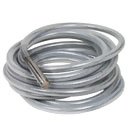 |

V-Block
Transducer Holder
|  |
|