The TI-MVX Ultrasonic Thickness Gauge with Enhanced Display offers a series of advanced features including A-Scan, B-Scan as well as a complete alphanumeric datalogging system with storage capacity of thousands of data values and A-scan captures. The TI-MVX TI-MVX Ultrasonic Thickness Gauge with Enhanced Display features the highest resolution graphic LCD on the market and is especially engineered for optimal ease of use. The TI-MVX Ultrasonic Thickness Gauge with Enhanced Display is supplied as a complete kit with all accessories in carrying case with FREE software, transfer cable and NIST-Traceable Calibration Certificate. 
Features

The MVX is equipped with multiple viewing options to provide users with a complete set of inspection tools: (RF waveform, +/- Rectified waveform, Time based B-Scan, and Large Digits). The A-Scan rectified mode is commonly used for detecting flaws/pits in pulse-echo mode and measuring through paint and coatings in echo-echo mode. The time-based B-Scan feature of the MVX displays a cross section of the test material. It is commonly used to display the profile of the bottom surface of the test material. Built in hardware AGC gain control for through paint measurements in multi mode operation. The MVX has the ability to store 64 custom user defined setups. All factory setups can be selected, edited and saved to any setup location. CE Certified Use the visual alarm to set hi and lo limits for applications requiring specific tolerances. If the actual thickness value is above or below the limits, a red light is illuminated. Use the find feature to locate the detection point, while automatically adjusting the display to bring the signal into view. MVX also comes complete with our Windows? PC software for transferring data to and from a PC. Includes Flaw Inspection - Prove Up Mode, (special probe required) The high speed scan feature speeds up the inspection process by making 32 measurements per second. Remove transducer from the tesst material, and display the minimum measurement scanned. Includes NIST Calibration Certificate
 Specifications Specifications
| Range in Steel* | Pulse-Echo Mode: Pit and Flaw detection measures from 0.63 to 254 millimeters (0.025 - 9.999inches)
Echo-Echo Mode: Thru Paint & coatings measures from 2.54 to 102 mm (0.1 - 4.0 inches).
Range will vary +/- depending on the thickness of the coating.
*Range varies by transducer, multiple transducers are required to cover entire range | | Resolution | .001 inches (0.01mm) | | Velocity Range | .0492 to .3936 in./ms
1250 to 9999 meters/sec | | Units | English & Metric | | Measurement Modes | Pulse-Echo (flaws, pits)
Echo-Echo (thru-paint) | | Transducer Types | Dual Element (1 to 10 MHz). | | Memory | 16 megabit non-volatile ram | | Memory capacity | 12,000 pages with 1 reading and waveform per page | | Power Source | Three 1.5V alkaline or 1.2V NiCad AA cells | | Battery Life | Typically operates for 150 hours on alkaline and 100 hours on NiCad | | Auto Power off | if idle 5 min | | Display | 1/8 in. VGA grayscale display 62 x 45.7mm | | Keyboard | Membrane switch with twelve tactile keys | | Case | Extruded aluminum body with nickel-plated aluminum end caps (gasket sealed). | | Operating Temperature | -14° to 140°F (-10° to 60°C) | | Weigth, net | 383 grams | | Dimensions | 63.5 W x 165 H x 31.5 D mm | | Warranty | 2 year limited | | Certification | CE Approved, Factory calibration traceable to national standards |
 Complete Kit Complete Kit
The TI-MVX Ultrasonic Thickness Gauge with Enhanced Display is supplied as a complete kit with the gauge, 4 oz. bottle of coupling fluid, 2 AA batteries, NIST Calibration Certificate, data transfer software, serial output cable and Operating Instruction Manual - all in a foam-fitted carrying case. 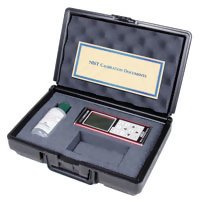
 Optional Accessories Optional Accessories
NIST-Traceable Steel Test Block
3 Sizes Available | 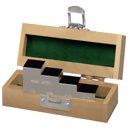 |

Uncertified Steel Test Block
For Ultrasonic Gauges | 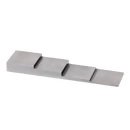 |

TICC-M
Protective Holder for Ultrasonic Gauges | 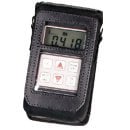 |

CF12
Coupling Fluid
|  |

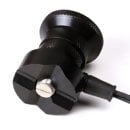
V-Block
Transducer Holder
|  |

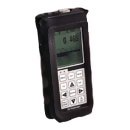
TICC-MVX
Protective Holder for Ultrasonic Gauges
|  |
|


